RED CURRY CHICKEN

RED CURRY CHICKEN

Every once in a while I crave something curry and coconut milk. For a while, I was going to a local restaurant often just to order their red curry. I decided to try make it at home and also use a different variety of vegetables that I really like with curry. You can use other veggies besides what you see here, as well. Today, I’m sharing my recipe for red curry chicken.

Red Curry Chicken

Ingredients 

1 large chicken sliced into small pieces 

4 oz red curry paste 

1-2 19 oz can coconut milk (1 can as per recipe or 2 cans for extra coconut flavor) 

20 oz can bamboo shoots

15 oz mushrooms 

8 oz bag mini sweet peppers 

2 pcs eggplant

8 sprigs basil 

1 1/2 tsp salt 

1/2 tsp msg (monosodium glutamate)

1/2 tsp fish sauce 

2 tbsp vegetable oil 

Some pictures for reference

oh, I forgot to add the egg plant

Prepare 

Wash basil and sweet peppers. Cut sweet peppers. Pull basil leaves off of the stem if you  desire or just leave them on the stems. Open cans of coconut milk, red curry paste, bamboo shoots and mushrooms. Drain bamboo shoots and mushrooms. Cut chicken into small pieces. 

Cooking Instructions 

Using a 5 quart pot, heat 2 tbsp oil in pot on high. Add Chicken. Turn heat down to medium. Add 1/2 tsp salt. Add 1/2 tsp msg. Stir together. Add red curry paste as much as you desire. (I used half of the can, you can always more later) Mix well. Add bamboo shoots, mushrooms, eggplants and sweet peppers. Add 1 tsp salt and 1/2 tsp fish sauce. Mix well. Add coconut milk. Fill the same emptied can of coconut with water. Add water to pot. Let cook on medium for 5 minutes. Add basil. Let cook on low for another 5 minutes. Add more salt and red curry paste to taste. Serve with steam rice. It’s ready to eat! 

I don’t make this dish very often, but my husband said he liked this one. I liked it too. So I thought I could of ahead and share this recipe with you. If you try this, let me know how you like it. If you have any suggestions,  please leave them in the comments below. I would love to hear your thoughts.

P.S. Please feel free to leave suggestions on what recipes you would like to see at any time in the comments as well.

xoxo,

OLD END TABLE GETS A MODERN MAKEOVER

OLD END TABLE GETS A MODERN MAKEOVER

It is pretty simple to paint a small piece of furniture in a day or over the weekend. This yard sale find was only $5! If I found this today, I probably would clean it up and left it as is to put in my younger son’s room. But at the time, I was looking for furniture for my office where I wanted white furniture with gold hardware. I used this to hold my printer on the shelf and copy paper in the drawer it was in the home office. It now holds kid’s books on the shelf, as well as, coloring/drawing items in the drawer. It is currently being used in my son’s bedroom.


Clean thoroughly. I use water, dawn and vinegar. Let dry. Sand (I used 150 grit). Wipe off all the dust. Prime using Krylon Indoor/Outdoor Primer in white. Spray paint using Krylon flat white. Spray thin coats, evenly as possible. It may take at least 4 coats. I don’t have during pictures with the flat white spray paint (sorry).

I used some leftover legs I had in the garage that came with a dresser.

Wipe metal legs clean. Again, prime with Krylon Indoor/Outdoor Primer spray paint. Wipe off any dust between coats after it dries. Then I used Rustoleum Specialty Metallic Gold. Spray thin coats, evenly as possible. Let dry. Assemble legs to table and change out hardware. 

xoxo,

BEFORE AND AFTER: OUR LIVING ROOM

BEFORE AND AFTER: OUR LIVING ROOM

I don’t know about you, but I love looking at before and after pictures. I would do this for hours on end if I could. Whether it’s a full renovation, makeover or a diy project, I’m always inspired to redesign or create. I thought it would be fun to share some before and after pictures of the rooms we have made over with you. Here are before and after pictures of our living room.

This was probably the day after we moved in. 

Excuse the mess. Kids playing. 

We didn’t makeover the fireplace yet, but here is the cozy corner by the fireplace.

Excuse the mess again and the photo bomb. Kids playing. This was right before painting. As you can see, we had to patch up a lot of holes. 

xoxo,

HOMEMADE NOODLES

HOMEMADE NOODLES

As promised from my asian chicken noodle soup post, I’m now doing a post on how to make homemade chicken noodles. Making it fresh makes such a big difference to me. Ahh, it’s so good! I always loved it when my mom made it for us. I’ve been telling her I need to learn how to make it from her. But she just spoils us and brings them over already made and we never got around to setting time to cook together. One night, I was just thinking about how much my youngest son loves these noodles and thought I really want to learn how make it myself.  Instead of calling my mom that late, I googled Cooking with Nana on you tube. Thanks Nana. We tried it for ourselves for the first time and it was a success. I happened to have pictures from this moment on my phone so I didn’t have to really cook for this post. hehe. I’ll try to add pictures of the packaged ingredients soon.

Homemade noodles 

Ingredients

2 bag tapioca starch 

1 rice flour 

Cooking Instructions

In a large mixing bowl add 1 bag tapioca starch and 1 rice flour. Mix together. 

In a large pot, boil 6 cups of water and then turn off after its boiling hot.

Scoop and pour in 3 cups of water into mixing bowl with the tapioca starch and rice flour. Mix together well with a mixing spoon. Add the remaining 3 cups of water and mix together more. Be careful! Be sure to mix with a mixing spoon and do not use your hands to mix yet until it has cooled down. When all is fully mixed and is in a dough form, you are ready to roll the dough. Use the second bowl of tapioca starch and sprinkle/spread on a cutting board. Take a hand full of dough and place on cutting board. Roll dough flat with rolling pin. Keep adding tapioca starch as you go to prevent dough from sticking.

Cut flatten dough into long noodle strand like pieces. Repeat until all the dough is cut into noodle form. 

Now you are ready to make some chicken broth.

Head over to my post for asian chicken noodle soup to get the chicken broth recipe.

xoxo,

ASIAN CHICKEN NOODLE SOUP

ASIAN CHICKEN NOODLE SOUP

Asian chicken noodle soup is my youngest son’s favorite asian dish. If you have a Lao market in your area you are likely to find some fresh noodles. This noodle is made of tapioca starch and rice flour. I bought a pack of fresh noodles from the Asian market for this post. Although, I will do a post on how to make these homemade noodles on another post.

Asian chicken noodle soup

Ingredients

2 pcs chicken breasts 

1 sweet onion (whole, peeled) 

1/2 tbsp thin soy sauce

1 tsp soy sauce

1 tsp fish sauce

1 1/2 tbsp salt  

1/2 tbsp msg (monosodium glutamate)

1/2 tbsp sugar 

1/2 tsp garlic powder

1/4 tsp ginger seasoning (optional 1/2 cut fresh ginger)

1 pack fresh noodles 

2 stalks celery (cut in half)

cilantro (chopped) 

green onions (chopped) 

Optional ingredients for toppings 

chilli garlic oil

fried onion 

fried garlic 

pictures of some ingredients for reference

Cooking instructions

Chicken broth

Use at least 8 quart pot. Fill up with water to 6 quarts or up to 3/4 full of the pot. Turn on high to bring water to a boil. 

Wash chicken and then add to the pot of water. After water boils turn down to medium and let boil for 10 about minutes. Skim foam and scum floating at top. 

(Yes. I put the celery and onion before I skimmed in this picture. oops. Yes. this is same picture from my beef pho. hehe)

Wash and cut cilantro and green onions. Cut off cilantro stems and green onion stems (cut off roots). Add cilantro stems and green onion stems to pot. 

 Add salt, msg, sugar, ginger seasoning, garlic powder, thin soy sauce, soy sauce, fish sauce.

Continue to let boil for an hour for best taste.

Prepare toppings

Wash, strain and chop cilantro and green onions. Set aside. 

Take some chicken out the pot of broth and place on cutting board. Cut or pull chicken. Set aside. 

 Prepare noodles

Transfer some chicken broth in a separate smaller pot. Bring to boil. Add noodles and let boil until fully cooked (for about 3 minutes) 

Transfer noodles and broth to a bowl. 

Add cilantro and green onions. You can also add fried onions and fried garlic and chilli garlic oil. 

xoxo,

HOME TOUR: COLORFUL BOY BEDROOM

HOME TOUR: COLORFUL BOY BEDROOM

This boys room is for a colorful, fun and lively little boy. This room suits my little one.

When we first moved in my little boy was confused and didn’t believe that this room was his room. He said, “Say whaaat? This is pink, it’s a girl room. I had to explain to him that we can paint it any color we want. He was so ready and excited to paint his room. The paint is by Benjamin Moore in “smoke gray”. My favorite part and the focal point of the room is the diy headboard. I wanted something he can grow into and could use for long time. I would’ve love this headboard for my own room. It was actually in his brother’s room from our previous house and we got this platform bed from his cousin. He always gets their hand me downs. We gave his crib/toddler bed to a friend that just had her baby at the time. We like to reuse and give as much we can.

After we got custom shelves in the living room and my tween boy’s room, we just had to have some for my little boy’s room. It is perfect to display his favorite books. He just picks one off the shelves before bedtime and puts it right back when we are done reading. I kept those letters from his 1st birthday party for his bedroom decor. Look at those adorable little lego transformers again. Custom made by his dad. He is so proud of them.

The end table is a yard sale find ($5). I painted it and changed out the hardware and the legs. I have a before picture somewhere of this end table that I will have to show another time. It was originally for my home office which has white and gold so I will tweak it a little if I decide to keep this in his room. It is perfect to store more books. We keep his construction paper, crayons, markers and colored pencil boxes in the drawer. He loves to draw and make everything with paper. Oh and masking tape.

The triangles duvet cover, train chevron pillow, train tray are all from my collection sold at Deny Designs. The train chevron pillow sham came as a sheet set which we bought when my son had a toddler bed (I bought the twin size). Of course, when we upgraded to a queen bed we couldn’t fit the twin sheet anymore. However, we were able to use the other pieces from this collection. There are also many other products in these prints. If you’d like, free to take a look at my full collection. The fabric garland is a quick diy project that my oldest son and I made with leftover fabric. We had a lot of this in his nursery/toddler boy room in our previous house. I will show how we reused them in another post.

I hope to see back again.

xoxo,


HOME TOUR: TWEEN BOY ROOM

HOME TOUR: TWEEN BOY ROOM

When we were picking out paint. I asked my son what color he wanted in his room. He immediately said black. His recently new favorite color at the time and now is black. It use to be blue and then red. I was taken back for a second, but I thought ” I love that”. When I showed him black paint swatches, he pointed at Benjamin Moore “universal black” before I finished my sentence. Ha. There’s that.

I really like the charcoal upholstered bed with silver nailheads. A friend of mine loved this so much, she got this for master bedroom when she saw it in my boy’s room. It looks great as master bedroom too. I think he can use this for a long time without outgrowing the style or it being outdated, and I am ok with that. At least I hope that’s the case. There is something about white sheets and comforters that is so…well comforting to me. That’s my go to for the rooms. I will have to accessorize with more pattern and color soon. 

I  needed some accessories to warm up the all the black and white. My good friend custom made these floating shelves that love so much. I love them even more when I vacuum room and not have to move furniture around to vacuum under it. The lamps are another yard sale find. They were $5 each, though I’m not sure how I remember this. I bought them when I first got married and was looking for cheap accessories for our house. They were once outdoor tea oil lamps. (?) We eventually added a light kit to make them functional lamps.

I painted this painting when my son was just learning to say “I love mommy” and “I love daddy”. He would say it all the time and that’s all he would say. I was trying to fill up a gallery wall in our living room with some artwork but didn’t know what to paint. sooo…that is how I wound up with this gem. haha. 

Can we talk about these lego transformers for a minute? My husband (yes I said my husband, lol) uses a program to figure out how and which lego pieces you need to put together to make these transformer guy actually transform. Cool, right? I guess that’s where my boys get it from. They love legos and building cool things.

My wish list: A round mirror above the bed. A decorative pillow of some sort would be nice.

xoxo,

HOME TOUR: OUR DINING ROOM

HOME TOUR: OUR DINING ROOM

Welcome back to another home tour at the La family house. Here we are in our “dining room”. It’s our eating area in our kitchen. Our official dining room is my home office. There is not much to see here. Literally. Minimalist style. Yes. 

The first thing I wanted to do was paint the walls. It’s the easiest to freshen up an old house and make it our own. We painted the walls in Benjamin Moore “distant gray”. We went ahead and added picture frame molding at the bottom and paint it a gloss finish, while we were painting walls. Mainly because I wanted to easily to wipe off any mess that got on the walls. Well at least the bottom part. haha. I’ve had this table for 5 years now. I still love it. I like the mix traditional/rustic look of it. Is the highest quality table around? No, it’s not all real wood. Although, I’ve had this table for 5 years now and it’s held up well. It’s sturdy. I have a lot of messy eating kids and I don’t worry about the stain wearing when I clean it. They also play rough with their toys on it and I don’t worry about it getting scratched or chipped. It is a great price for one on a budget. You can join the email list and catch a good sale on these. The bench is easy for kids to get in and out of their seat. It works well with the table without being matchy. The Louie clear chairs add a modern touch that I love. Honestly, the two arm chairs ended up there when we moved in because that’s the only chairs we had. So I got the other 4 chairs to go with what I had. I like that it’s see through and doesn’t block any natural light that comes through the window.

Just a simple accessory and greenery is all that was needed for the minimalist look I wanted. The tray is from goodwill. We just put napkins on it because they are a must to have near with messy boys eating at the table. I wanted to bring some greenery really quick so I picked some off a bush from my front yard and put them in a simple glass vase that I had. 

I love the light and airy feel with wood to warm up the space. I have been debating about putting something on the walls… but what? The spaces on the back wall are not balanced so I didn’t put up my set of 2 wood wall art that I had. I could put one on the left side of the window and the wall along the side of the table. I’m debating if it would be too much wood and take away from the light and airy feel. Should I add artwork? I will be on the look out for something special. Should I keep it clean and minimal as is? What do you think? 

My wishlist:  A new chandelier. 

I’m debating about respraying the one I had from my old house and get a longer lighting kit to accommodate for the high ceilings in the new house. You can see my diy chandelier on instagram. (from 155 wks ago. lol) 

I feel like something with wrought iron would work best at the moment. I have some in mind that I have added below. Which one should I choose? 

xoxo,


BEEF PHO

BEEF PHO

Welcome to my first food post!

Over the years I’ve grown to love cooking more and more. The more I experimented with flavors and it actually end tasting good, the more confident I was in trying to cook different foods. Now, I love sharing my cooking with family and friends. Nowadays, I get requests for me to cook certain dishes for get togethers, teach them how to cook something or share my recipes. Well I decided to actually measure and write it down everything I do so that I can actually share a real recipe with those family members and friends (and hopefully new friends) right here on my blog. 

So let’s start out with some Beef Pho, shall we? Pho is one of my favorite Asian dishes of all time. It’s one of the first dishes I learned how to cook when I first got married and has improved throughout the years.  I’m happy to share this recipe that my family and I will love pho life. 

Beef pho 

Ingredients

1 lb ox tail 

3 lbs beef round of eye (oven roast) 

1 pack meat balls (optional) (cut in quarters)

1 sweet onion (whole, peeled) 

1/2 tbsp thin soy sauce

1 tsp soy sauce

1 tsp fish sauce

1 1/2 tbsp Salt  

1/2 tbsp msg (monosodium glutamate)

1/2 tbsp sugar 

1/2 tsp garlic powder (optional 3 garlic cloves) 

1/4 tsp ginger seasoning (optional 1/2 cut fresh ginger)

1 pack rice noodles 

2 stalks celery (cut in half)

cilantro (chopped) 

green onions (chopped) 

Optional toppings 

basil

bean sprouts 

crushed peanuts 

siracha sauce 

hoisin sauce 

fried onion 

fried garlic 

some pictures for reference

Cooking instructions 

Beef broth 

Use at least 8 quart pot. Fill up with water to 6 quarts. I just happen to have a pot with measurement on the side. You can just fill the pot at 3/4 full. Turn on high to bring water to a boil. 

(Side note: If you want to brown ox tail, oven roast, onion, fresh ginger and garlic cloves. You can brown and roast them in a separate pan before putting them into the pot of boiling water)

If you want to skip, just go ahead and ddd ox tail and cut oven roast in quarters and then add 2 pieces of the roast to the pot of water. After the water boils, turn down to medium and let boil for about 10 minutes. Skim foam and scum floating at top. Add meatballs, whole sweet onion and celery.

(I added onions and celery before skimming in this picture. oops.)

Wash and cut cilantro and green onions. Cut off cilantro stems and green onion stems (cut off roots). Add cilantro stems and green onion stems to pot. 

 Add salt, msg, sugar, ginger seasoning, garlic powder, thin soy sauce, soy sauce, fish sauce.

Continue to let boil for an hour to 2 hours for best taste. 

Preparations while broth is cooking

Fill a large mixing pan with hot water. Soak rice noodles for 10 minutes. Drain water from noodles with strainer. Set aside. 

Chop cilantro and green onions. Set aside. 

Slice other 2 quarter pieces of oven roast. Slice thinly. Set aside. 

When the beef broth is done. It’s time to cook the noodles. Using a small separate pot, add enough water to cover the noodles you want to cook. Bring water to boil and add noodles to pot.  Cook for about 3 minutes or until noodles are soft. Strain and transfer to bowl. Add raw beef slices that you sliced and set aside before. Add oven roast, meat balls, and beef broth pot. Be sure that the broth is hot enough to cook the raw beef slices that is in the bowl. Otherwise, you can cook them in the same small pot as you cooked the noodles. 

Top with cilantro and green onions. 

Other optional toppings

sliced onions 

basil

bean sprouts 

crushed peanuts 

siracha sauce 

hoisin sauce 

fried onion 

fried garlic 

HOME TOUR: OUR LIVING ROOM

HOME TOUR: OUR LIVING ROOM

Hello there!

It’s been a long time since I have written a post. Like, since 2013 long. I have decided to come back and hang out here more often so I hope you will stop by and join me when you can. I’ll be sharing my favorite things that I like to do. Such as decorate, diy projects, organize and cook. I may share some stories of what I have been up to since I started Vy La Designs. But to start off on a lighter note. I want to share a decorating post.

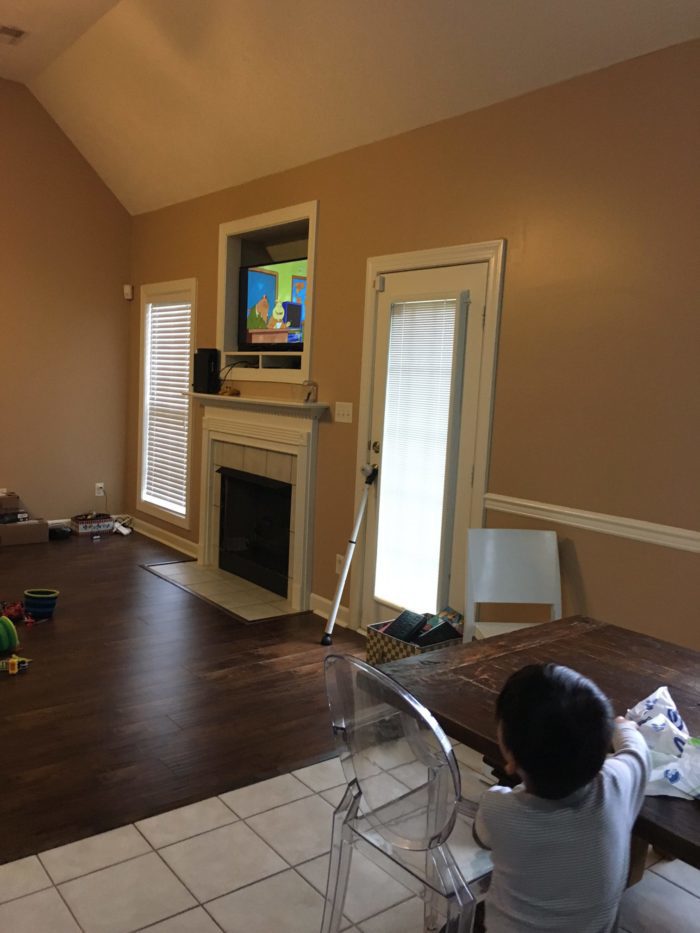
Back story: We moved into a new house at the beginning of 2016. Well new to us, it was built in 2007. We downsized 400 sq ft, but we initially wanted to downsize 800 sq ft. Mainly to live more simply. After getting rid of a lot of the stuff we had, it pushed us towards this way of thinking and living. It’s a work in progress. I’m most grateful and love that we are making this house our home. I have slowly but surely been doing or assigning projects here and there to make it our own.

Design Criteria:  Minimalist. Modern with rustic/industrial touches. Comfortable and kid friendly. Chic but not fussy. Warm and inviting.

Here is a tour of our living room. Cue song “Welcome to My House”…we don’t have to go-o out…

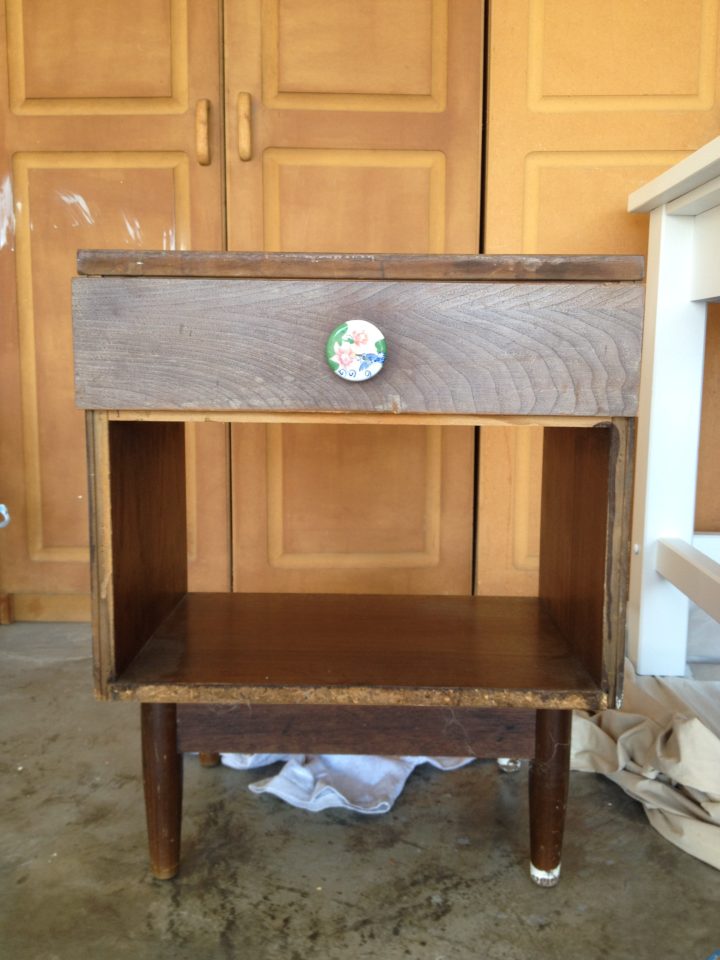
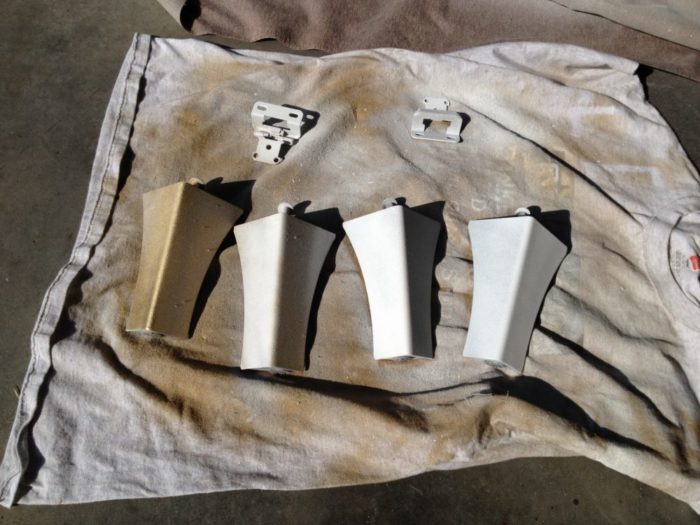
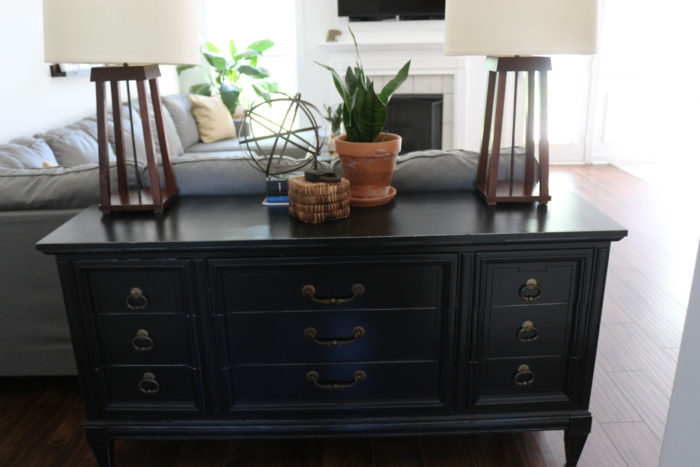
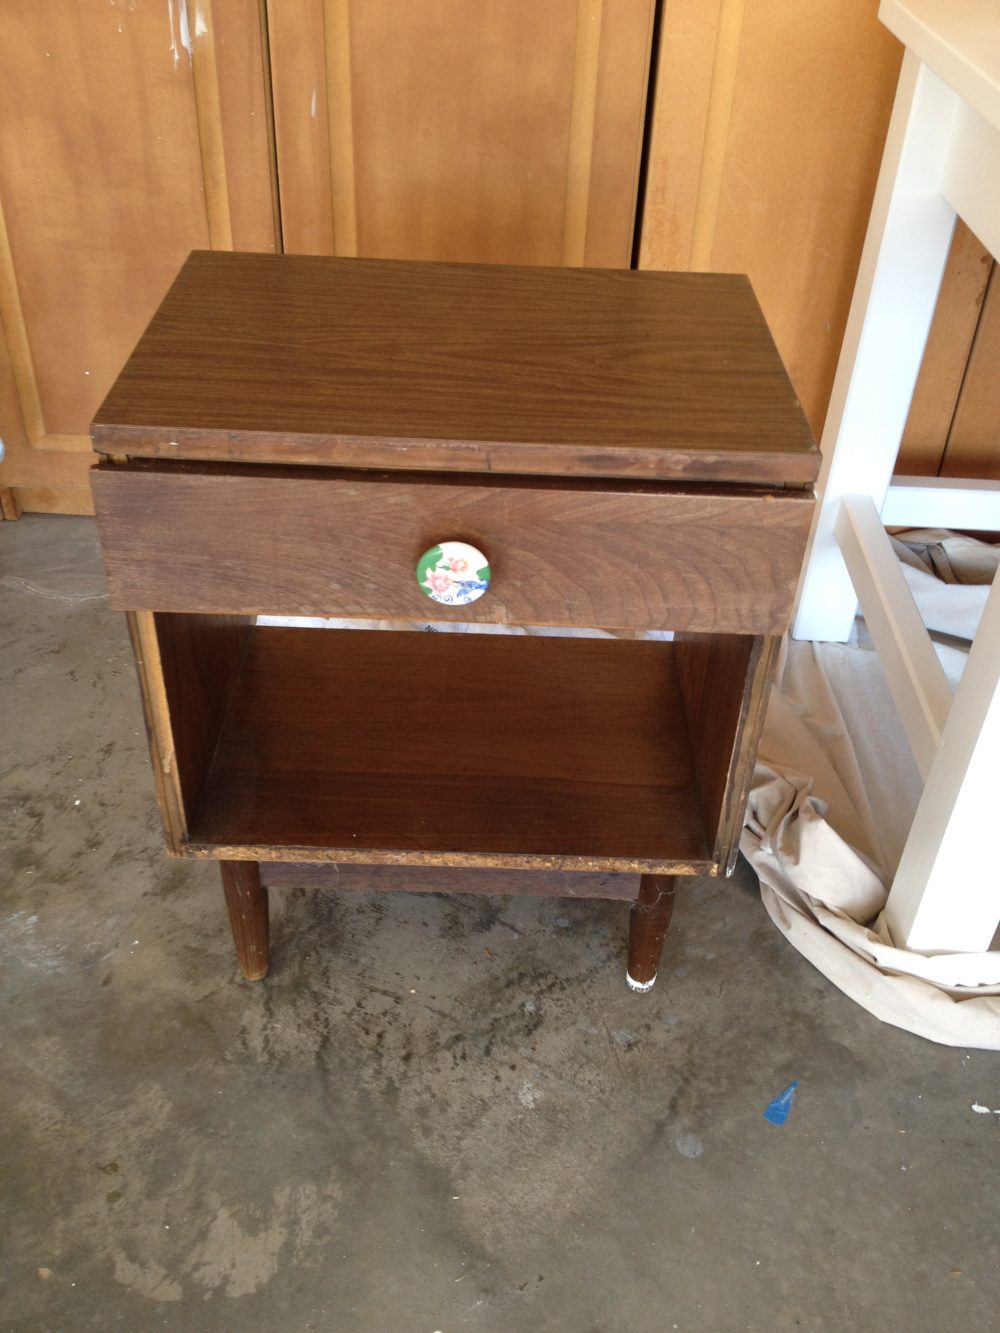
           When you first walk in and are standing in the entry way, you will see one of my favorite furniture finds. One of our first purchases from when I first got married, almost 14 years ago. It’s probably the only piece of furniture we’ve kept from the first house we lived in as newlyweds. It’s a yard sale find for $30! woo hoo! Within the last 13 years I have painted it black, then turquoise, then back to black hehe.

For accessories, I brought in subtle touches that reminds me of Laos,  my birth country,  in a modern way. I wanted to display these Lao bibles that were once my dad’s. He passed on our way to America at a refugee camp in Thailand in 1983. They are definitely one of my near and dear treasures for sure. The little basket reminded me of a thip khao, which are bamboo basket that holds a Lao staple, sticky rice. I had to have this one just to look at 😉 I found this lock with an antique trunk at a yard sale as well. You’ll find a picture of the antique trunk below.

I love the black wall! I want to paint a bigger wall black now. hehe. The black wall currently hides our kitchen behind it. But it’s not load barring, so I would like to knock it down to make it open to the living room. I love the light that floods in the back windows in this open floor family space. The wood floor warms up the black and white walls. By the way, the black wall paint is Benjamin Moore “universal black”

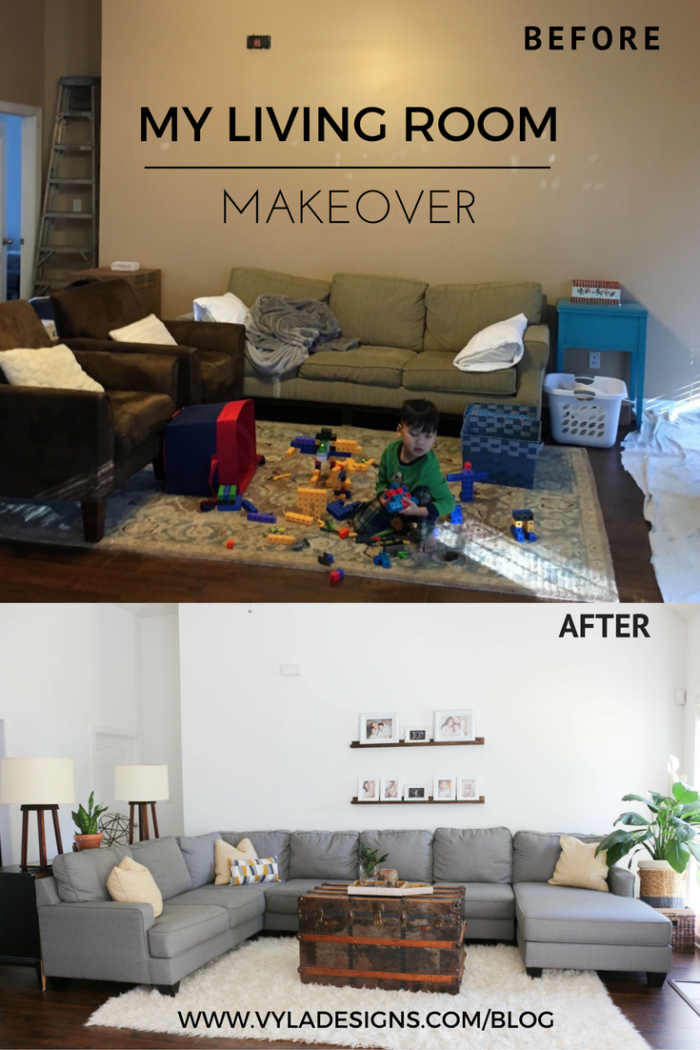
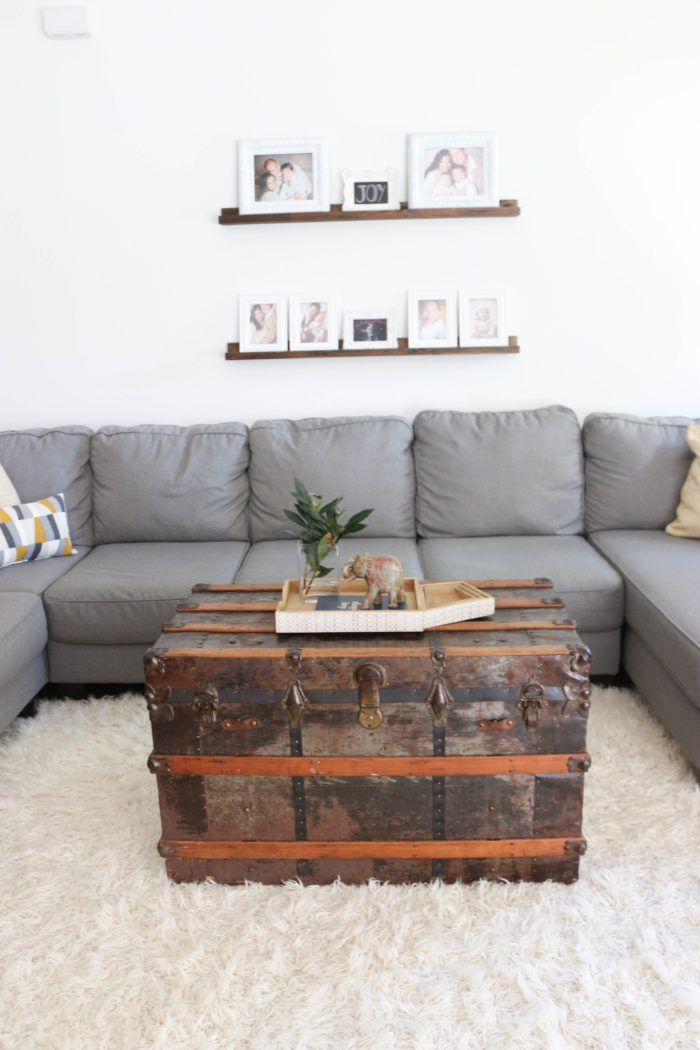
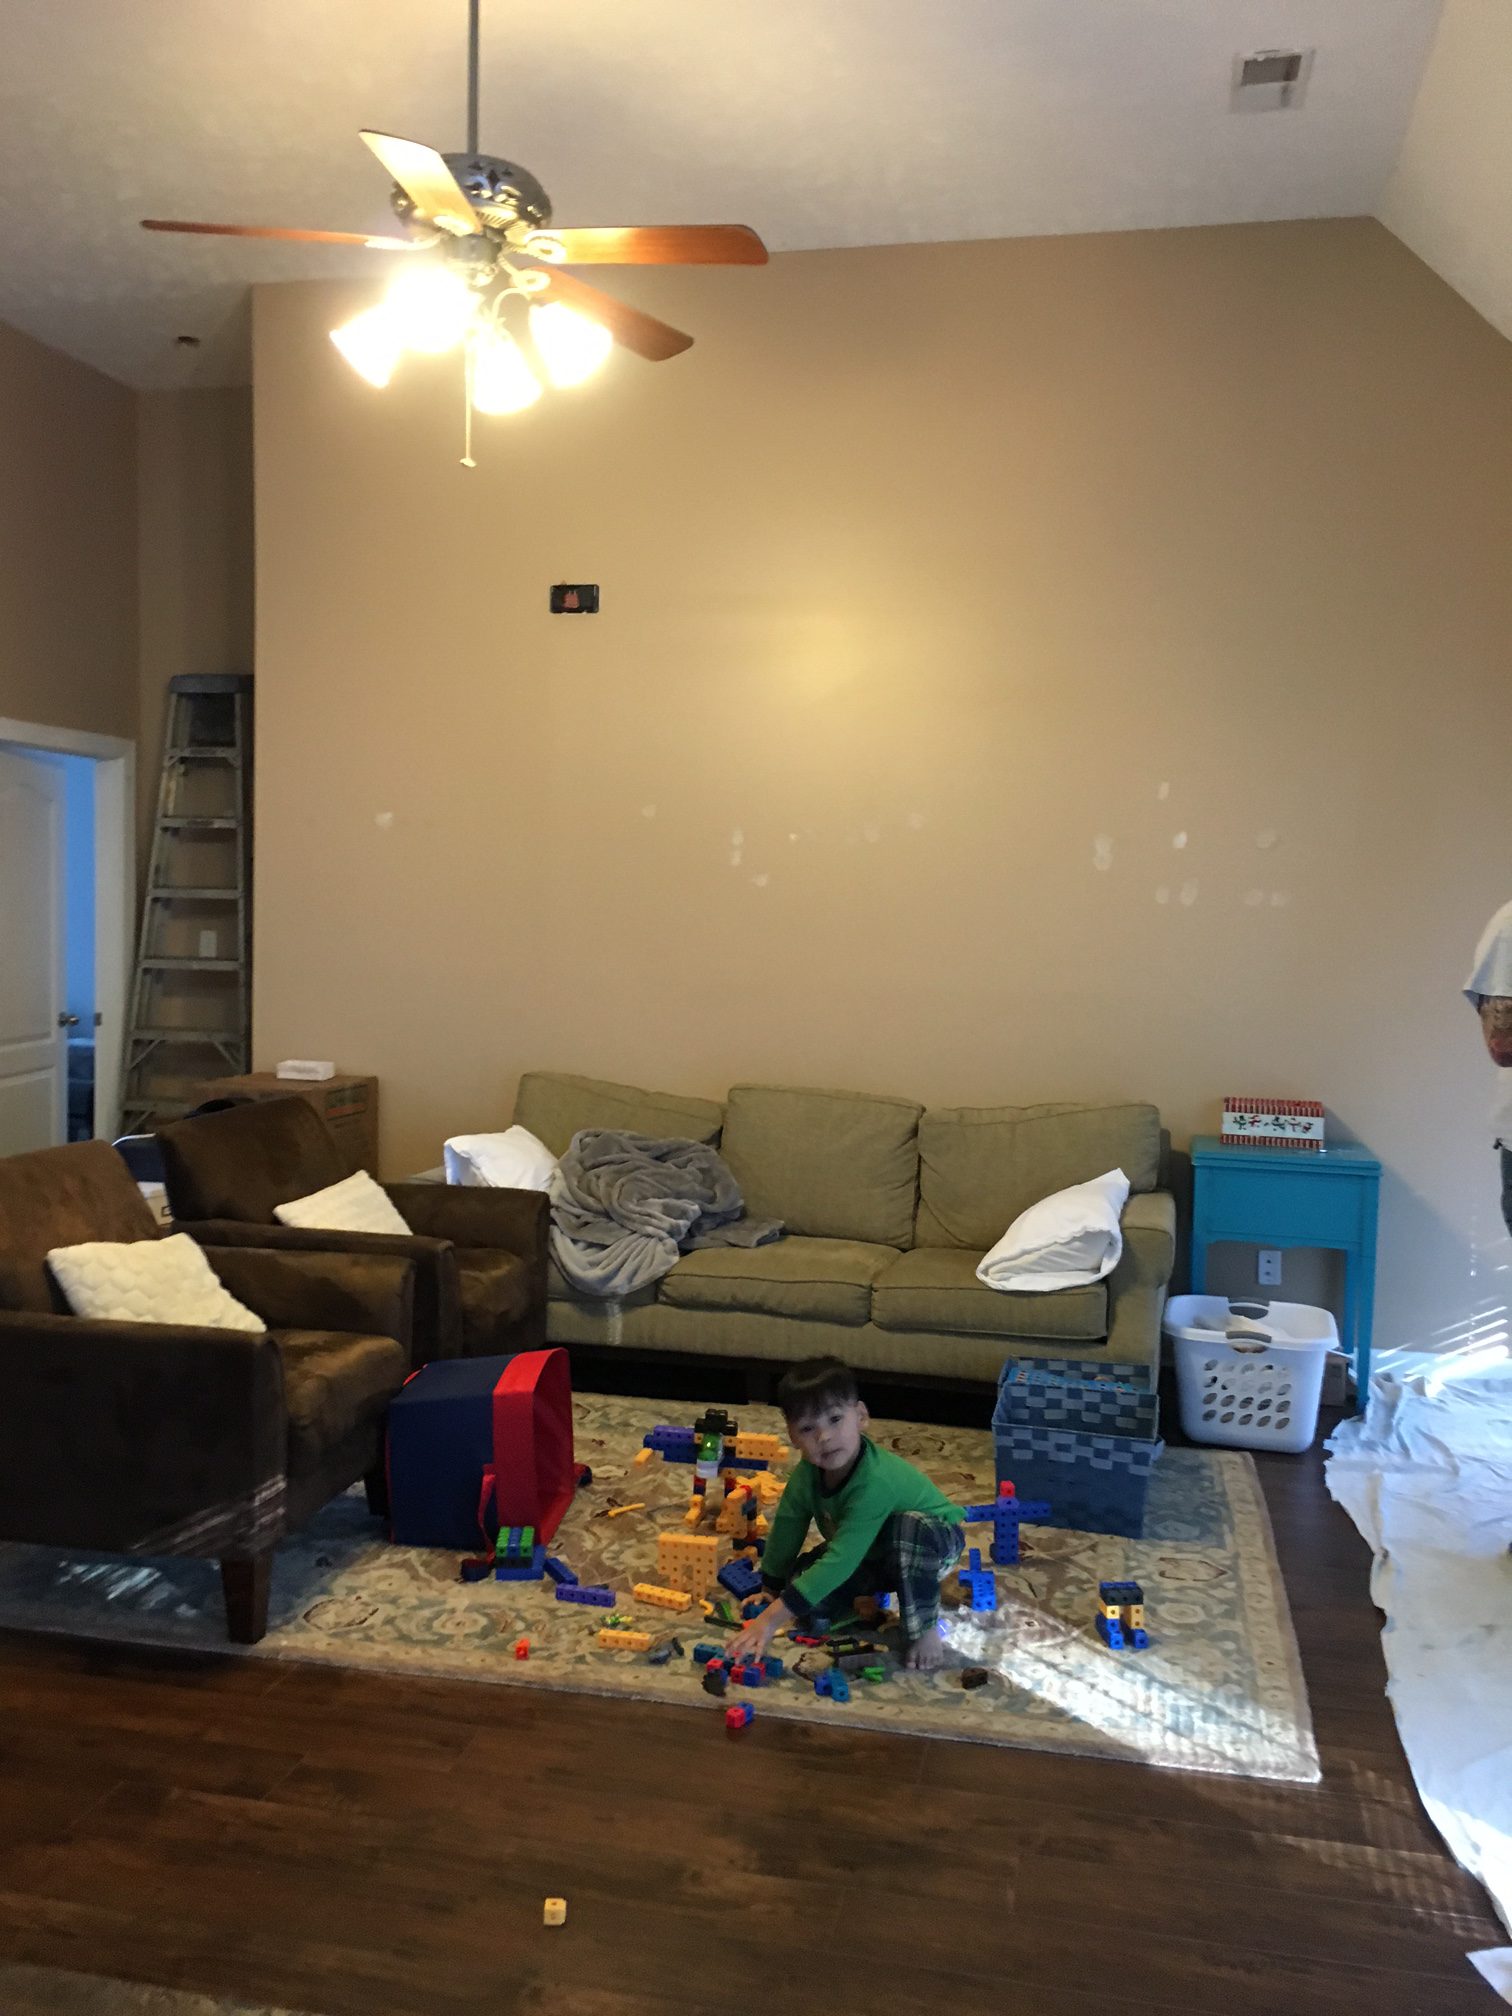
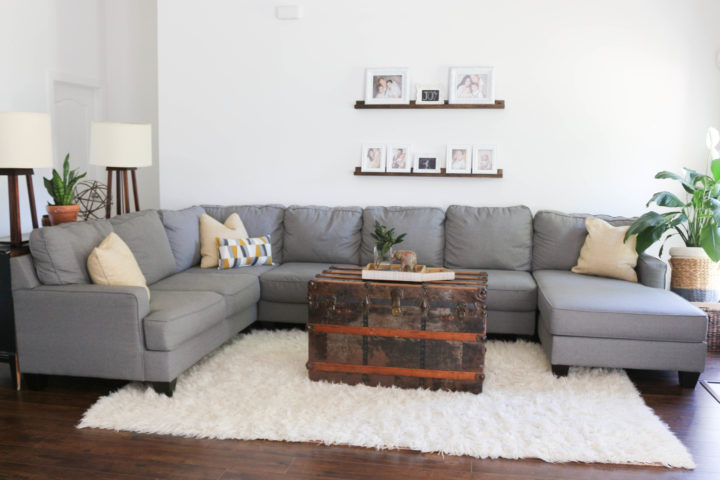
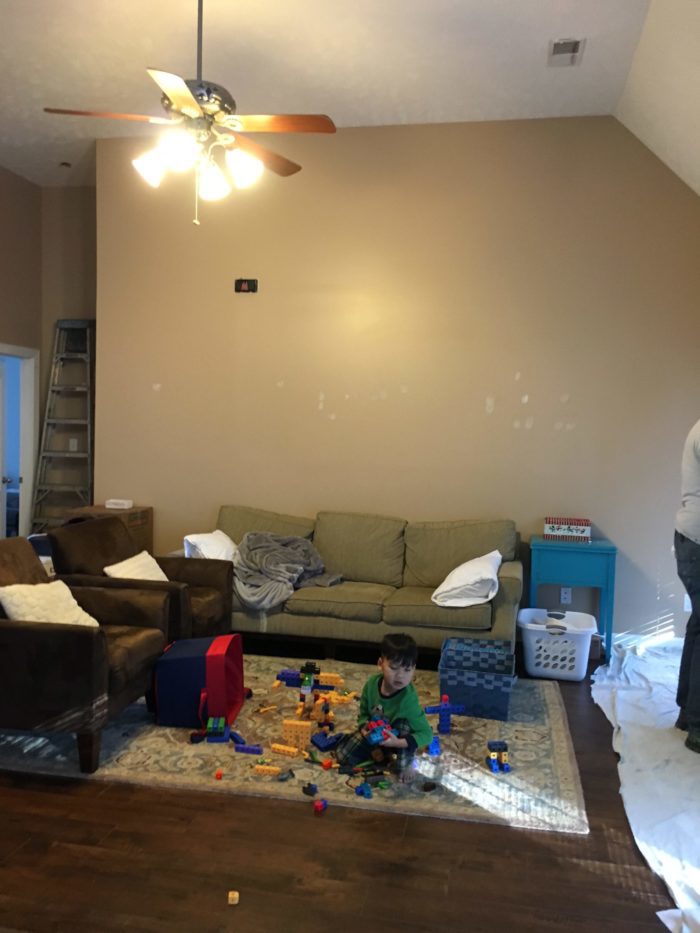
The first thing I wanted to do after moving in was paint the walls. My husband wanted a light gray, same as our old house. I wanted white , something different from our old house. When I showed him paint swatches, my husband said “what ever paint color you want as long as it’s some kind of gray. When we bought the gray sectional, I decided on Benjamin Moore “distant gray” paint. You guys, it looks white right? lol. My husband claims he was tricked because it looks white and I told him it was a light gray aka “distant gray”. lol. Anyways, I love it even though he has reservations about it. It totally transformed our house and freshened up our older, but new to us home. Now, it was time to bring in things that would compliment our style and lifestyle. The only thing new we bought for this living room is this sectional. I added a modular seat within and it looks hurrrge. I wanted something comfortable with modern and clean lines. We love just lounging and watching movies on this beast. I didn’t want to put a lot of furniture in this room. This sectional is perfect for accommodating seating for our guests as well as our family lounging. 

The shelves were custom made by a good friend and they are perfect. I wanted to able to switch out wall art and pictures without having to put more hole on the walls or repaint. This antique trunk is also one of my favorite finds. I got it at yard sale for about $20! Then I started seeing replica trunks everywhere. So I did good on finding that beforehand. I store my own treasures in “me treasure box”. aka..Family pictures and artwork.

The corner by the window is where my son likes to hang out and watch his iPad. All. the. time. I was so excited for spring and got this peace lilly plant to liven and warm up the space. Although, I think I should get a new basket for it. 

One of my best friends bought me 3 of these marble elephants. I have 2 more on my mantle. (Thank you, Chinh!) When we were in college, (a long time ago) browsing through a cute boutique during christmas time and I mentioned that 3 of these would be cute together, reminding me of the Lao flag at the time. Little did I know, she went back and got it for me for christmas. Lol. huh? lol. Always so sweet and thoughtful, that girl. Although, I didn’t really know what to do with them during our college days, I always find a place for these gems in every house I’ve lived in since I’ve moved out of my mom’s house. P.S. It goes perfect with the my dad’s old Lao church hymnals. 

My wishlist: New pillows. Always. Yes I do have dozens of pillows in the playroom which my boys now use for pillows wars. This is where I like to bring in some color and pattern. Although, I want to keep the overall look light and airy. 

My thoughts on design: You don’t have to over think it. You don’t have to buy more and more. Before we moved from our previous house. I purged so much home decor stuff (and stuff in general) that I had stored away. I had so many things in my home that I did not love. When we purged before moving, I kept the things I loved and treasured and used them in this room where I can see it and appreciate it more. Also, when I was purging, I noticed that the things I kept were pieces I found from yard sales or things we DIYed. We sold or gave away all of the big box store furniture where we spent $$$-$$$$. Because we didn’t love them and they weren’t always better quality than things we got from a yard sale or that we DIYed. Although, I do like some as main pieces to build off, like the awesome sectional. So there’s that.

Well, that’s my living room. Come visit me again to see more of the house real soon. You are always welcomed here.

xoxo,

error

Enjoy this blog? Please spread the word :)